Difficulty Level: Advanced
Prerequisite: You should be familiar with Vue.js 2.x / 3.x and familiar with the usage of v-model directive.
Takeaway: This article gives you an understanding of the behavior of v-model in custom component implementation in Vue 2.x and 3.x
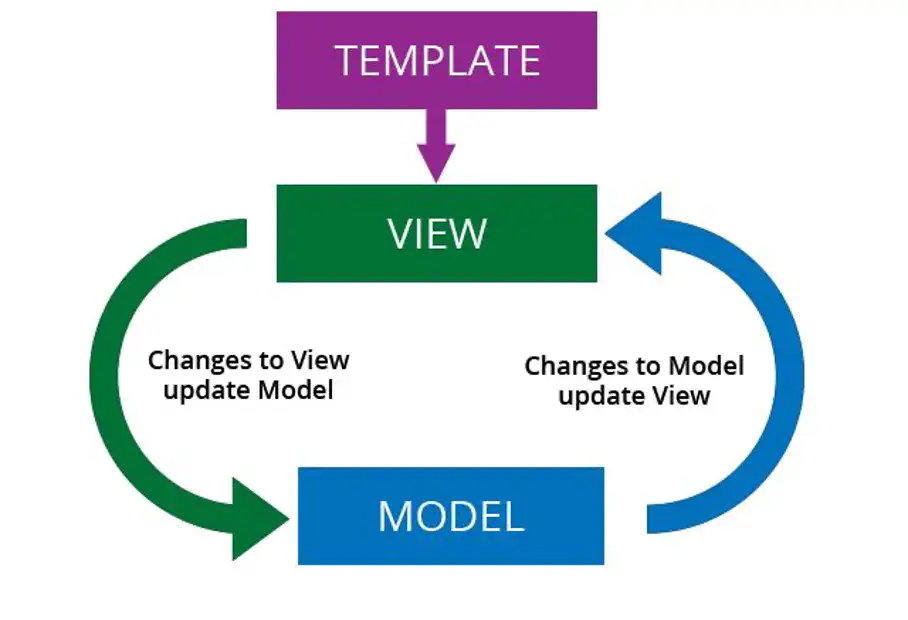
What is Two-way binding?
- 1. When the data model properties get updated, the UI elements getupdated.
- 2. When UI elements get updated, the same changes are propagated back to the data model property almost immediately.
V-model directive is commonly used in form elements like input, select, text area, and radio in Vue.
1
2
3
4
5
6
7
| <!-- Manually bind the value and update the dta property on change event -->
<input
:value="messageInput"
@input="event => messageInput = event.target.value">
<!-- The v-model directive simplifies the above -->
<input v-model="messageInput">
|
We can also utilize the advantage of v-model in custom component to build two way communication between parent and child component. The behavior and implementation is slightly different in vue 2.x and 3.x
Here we can see the differences with examples
Vue 2.x
Parent Component
 1
 2
 3
 4
 5
 6
 7
 8
 9
10
11
12
13
14
15
16
17
18
19
20
21
22
23
24
25
26
| <template>
<main>
<WelcomeToVue v-model="greetingMessage" />
</main>
</template>
<script>
import WelcomeToVue from '@/components/WelcomeToVue.vue'
export default {
name: 'HomeView',
components: {
WelcomeToVue
},
data () {
return {
greetingMessage: ''
}
},
watch: {
greetingMessage (newValue) {
console.log(newValue)
}
}
}
</script>
|
Child Component
 1
 2
 3
 4
 5
 6
 7
 8
 9
10
11
12
13
14
15
16
17
18
19
20
21
22
| <template>
<div>
<button @click="userClicked">Click Here</button>
</div>
</template>
<script>
export default {
name: 'WelcomeToVue',
props: {
value: {
type: String,
default: ''
}
},
methods: {
userClicked () {
this.$emit('update:value', 'message updated')
}
}
}
</script>
|
The data sync is achieved by emitting the event update:value
, the shorthand for v-model
is
1
| <WelcomeToVue :value="greetingMessage" @input="greetingMessage = $event" />
|
If we wanted to change prop or event names to something different, we would need to add a model option to the child component
 1
 2
 3
 4
 5
 6
 7
 8
 9
10
11
12
13
14
15
16
17
18
19
| <!-- Parent Component -->
<WelcomeToVue v-model="greetingMessage" />
export default {
model: {
prop: 'greetingMessage',
event: 'change'
},
props: {
// this allows using the `value` prop for a different purpose
value: String,
// use `greetingMessage` as the prop which take the place of `value`
title: {
greetingMessage: String,
default: 'Default message'
}
}
}
|
So, v-model
in this case would be a shorthand to:
1
| <WelcomeToVue :title="greetingMessage" @change="greetingMessage = $event" />
|
Vue 3.x
In Vue 3.x, it has breaking changes during migration from 2.x to 3.x
Prop: value -> modelValue
Event: update:value -> update:modelValue
In 3.x we can have multiple v-model
bindings in same component.
Parent Component
 1
 2
 3
 4
 5
 6
 7
 8
 9
10
11
12
13
14
15
16
17
18
19
20
21
22
23
24
25
26
| <template>
<main>
<WelcomeToVue v-model="greetingMessage" />
</main>
</template>
<script>
import WelcomeToVue from '@/components/WelcomeToVue.vue'
export default {
name: 'HomeView',
components: {
WelcomeToVue
},
data () {
return {
greetingMessage: ''
}
},
watch: {
greetingMessage (newValue) {
console.log(newValue)
}
}
}
</script>
|
Child Component
 1
 2
 3
 4
 5
 6
 7
 8
 9
10
11
12
13
14
15
16
17
18
19
20
21
22
| <template>
<div>
<button @click="userClicked">Click Here</button>
</div>
</template>
<script>
export default {
name: 'WelcomeToVue',
props: {
modelValue: {
type: String,
default: ''
}
},
methods: {
userClicked () {
this.$emit('update:modelValue', 'message updated')
}
}
}
</script>
|
You need a help building a web application? Drop us a line here.
Written by:

Chandra Sekar
Senior Frontend Developer
Chandra is an exceptional Vue.js frontend developer who consistently delivers outstanding results. With a keen eye for detail and a deep understanding of Vue.js, Chandra transforms design concepts into seamless and visually captivating user interfaces.
Chandra is an exceptional Vue.js frontend developer who consistently delivers outstanding results. With a keen eye for detail and a deep understanding of Vue.js, Chandra transforms design concepts into seamless and visually captivating user interfaces.